2012年6月24日 星期日
Pocket Plane心得
1. 飛行成本只看重量和路線,和起飛降落成本無關
本來以為中途多幾個轉運站會有成本問題,後來發現沒有影響
各機型的成本、速度、整體評價表可以看下面連結
https://docs.google.com/spreadsheet/ccc?key=0AuOfJLAqduq7dGFHZW1rNjRuRmc2Z3ZLbzlSYS1sSnc#gid=0
MAX earning和MAX earning per hour的差別在於前者是讓飛機自己飛,比較不常玩的話,可以選Max Earning高的機種
後者適合比較常玩的人
不過因為Max Earning和Max Earning Per hour的差異不太大
我是直接挑Max Earning高的機型為優先
2. 盡量買大城市就好
大城市的job比較多
城市配置在航程內盡量拉遠
3. 飛行途中會有bux/鈔票和金幣,初期蠻有用的
4. 起步
我是從亞洲開始
向外發展時,初期的機種航程不夠
所以我選擇買廣州向外延伸
北京、瀋陽並不合適作為到東南亞的轉運點
也別買Taipei..它對發展沒啥用,雖然我有買 :p
這邊有個重點是anan機型別買,它的預設645航程無法跨越廣州/瀋陽到DHAKA的距離
然後中間又沒有什麼好的機場候補..
所以我會建議別買Anan直升機機種
5. lv10以上
等到10左右,應該會開始進入class 2機型
不過有些event地點是class 1, 所以還是要保留幾台class 1
推薦保留Kangaroo作為運輸用
如果不怕麻煩的話,也可以使用anan作為短程運輸
不過ANAN距離太短,可能要偶爾買幾個小機場作為停靠點
買最小的大概1xxx可以搞定
如果願意花bux, 那ANAN由於速度快,是一個不錯的選擇
不過整體來看,我還是覺得KG比較順手
2012年6月20日 星期三
Titanium 動畫與view的關係
Titanium on iOS上,有提供動畫功能
不過有些view本身是不合適動態改變大小的
例如webview..
例如以下情況
viewA.top=0;
viewA.height=50;
viewA.animate({top: 100, height:200});
如果viewA是mapview,動畫效果會包括從0移動到100, 同時尺寸會從50成長為200
但viewA是web view時,動畫效果是viewA從50立刻變成200, 同時會從0移動到100
因此在使用動畫時,要注意viewA的類別是否為可動態改變大小的view
因為這問題,在處理時會需要考慮作法:如何讓動畫顯示的順暢
題外話:
同事比較偏好這作法
不過有些view本身是不合適動態改變大小的
例如webview..
例如以下情況
viewA.top=0;
viewA.height=50;
viewA.animate({top: 100, height:200});
如果viewA是mapview,動畫效果會包括從0移動到100, 同時尺寸會從50成長為200
但viewA是web view時,動畫效果是viewA從50立刻變成200, 同時會從0移動到100
因此在使用動畫時,要注意viewA的類別是否為可動態改變大小的view
因為這問題,在處理時會需要考慮作法:如何讓動畫顯示的順暢
題外話:
同事比較偏好這作法
2012年6月18日 星期一
titanium table data在android上取用問題
在android上註冊table事件並取用資料,如e.source時
有時會有null問題
後來發現問題在於data item的設定方法
var dataitem= Ti.UI.createTableCellView({
aa: '123'
});
dataitem.bb = '456';
在這寫法下,取得e.aa不會有問題
取得e.bb則會有10%成功機會
簡單來說就是把已知、必須的data item property盡量在create時就帶入
有時會有null問題
後來發現問題在於data item的設定方法
var dataitem= Ti.UI.createTableCellView({
aa: '123'
});
dataitem.bb = '456';
在這寫法下,取得e.aa不會有問題
取得e.bb則會有10%成功機會
簡單來說就是把已知、必須的data item property盡量在create時就帶入
cheat sheet: 終於可以移除keycue了
keycue
http://www.osxtoy.com/2011/06/27/keycue-mac%E5%BF%AB%E6%8D%B7%E9%94%AE%E6%9F%A5%E7%9C%8B%E5%B7%A5%E5%85%B7/
cheatsheet
http://itunes.apple.com/tw/app/cheatsheet/id529456740?l=zh&mt=12
key cue和cheat sheet都是顯示hotkey的app
而且說真的,cheat sheet沒有keycue來的好看
可是!
keycue實在太誇張的貴了(20歐
我真的買不下手..
LAUNCHER 和alfred類似的自定義spotlight app
launcher
http://itunes.apple.com/tw/app/launcher/id402270706?l=zh&mt=12
alfred
http://itunes.apple.com/tw/app/alfred/id405843582?l=zh&mt=12
這兩個ap蠻類似的(快速鍵也被我設成一樣 :p
都提供自定義快速鍵功能展開程式介面,並在介面中執行一些工作
例如可以輸入 1+3=計算數字,或輸入 google os x查詢資料、define manager開啟字典之類功能
不過我覺得alfred比較好用(雖然power pack要錢..
聽說launcher+ geed tool能達到相同甚至更強效果
想省錢的人可以試試看
appbar 快速app查詢
http://itunes.apple.com/tw/app/app-bar/id464303501?l=zh&mt=12
dock能放的app有限
使用spotlight找app又會跳出一些奇怪的查詢
開finder顯示application folder時,總是爆慢
有這樣困擾的您,app bar是你的一個好選擇
他的作用很簡單,把status bar上面提供一個顯示application folder內容的快捷icon
點開來就會根據字母/筆劃顯示所有app讓你自己找
而且不會有delay問題
這樣的app有些時候其實不錯用..
雖然我有更好的想法..
dock能放的app有限
使用spotlight找app又會跳出一些奇怪的查詢
開finder顯示application folder時,總是爆慢
有這樣困擾的您,app bar是你的一個好選擇
他的作用很簡單,把status bar上面提供一個顯示application folder內容的快捷icon
點開來就會根據字母/筆劃顯示所有app讓你自己找
而且不會有delay問題
這樣的app有些時候其實不錯用..
雖然我有更好的想法..
menu pro 用快速鍵存取menu功能
http://itunes.apple.com/tw/app/menupop/id404747434?l=zh&mt=12
menu pro允許使用者使用自定的快速鍵在app中呼叫主選單
曾經得過apple獎
只是,以我來說
我會希望他能多加一個整合到右鍵的功能
快速鍵太多了,很難找到一個沒用過的global組合
不過那樣設計的話會無法通過sandbox測試..
menu pro允許使用者使用自定的快速鍵在app中呼叫主選單
曾經得過apple獎
只是,以我來說
我會希望他能多加一個整合到右鍵的功能
快速鍵太多了,很難找到一個沒用過的global組合
不過那樣設計的話會無法通過sandbox測試..
aptus 測試網頁在不同裝置效果
http://itunes.apple.com/tw/app/aptus/id510487565?l=zh&mt=12
aptus可以設定多組裝置(瀏覽器、解析度)
並設定網址測試在裝置上的效果
因為是同時設定,所以可以取得在同樣設定下不同裝置上的效果
此外還可以將個別的結果整個擷取下來
如最後的圖就是擷取 iphone裝置設定時的網頁內容
有提供safari on mac/ios和IE7/8/9設定
但是我不確定顯示效果有沒有包含瀏覽器相容性問題
設計網頁時會很有用的一套APP

aptus可以設定多組裝置(瀏覽器、解析度)
並設定網址測試在裝置上的效果
因為是同時設定,所以可以取得在同樣設定下不同裝置上的效果
此外還可以將個別的結果整個擷取下來
如最後的圖就是擷取 iphone裝置設定時的網頁內容
有提供safari on mac/ios和IE7/8/9設定
但是我不確定顯示效果有沒有包含瀏覽器相容性問題
設計網頁時會很有用的一套APP
foldertidy 自動分類檔案到資料夾
http://itunes.apple.com/tw/app/folder-tidy/id486626129?l=zh&mt=12
可以把一堆檔案/資料夾自動分類並新建對應名稱的資料夾
不過嘛..這樣弄出來的資料夾只是讓桌面好看
對於日後尋找並沒有用處
可以把一堆檔案/資料夾自動分類並新建對應名稱的資料夾
不過嘛..這樣弄出來的資料夾只是讓桌面好看
對於日後尋找並沒有用處
shipit icon處理用app
http://itunes.apple.com/tw/app/shipit!/id492043869?l=zh&mt=12
拖拉圖片進去,選擇要做成的目標(app icon大/小、itunesartwork或其他icon
就會自動放到指定資料夾
這種icon處理app好多…
如果他有提供指定區域resize/export就好了
icon處理的問題在於 57x57/ 114/114, 512/512或72x72, 50x50所需的大小和設計其實不同
一方面是所置放的位置(spiring board, iTunes, app setting)
一方面是大小問題
只有很簡單的icon可以直接用resize方式處理
拖拉圖片進去,選擇要做成的目標(app icon大/小、itunesartwork或其他icon
就會自動放到指定資料夾
這種icon處理app好多…
如果他有提供指定區域resize/export就好了
icon處理的問題在於 57x57/ 114/114, 512/512或72x72, 50x50所需的大小和設計其實不同
一方面是所置放的位置(spiring board, iTunes, app setting)
一方面是大小問題
只有很簡單的icon可以直接用resize方式處理
cobook 同步FB/linkin/twitter聯絡人
http://itunes.apple.com/tw/app/cobook/id525225808?l=zh&mt=12
我不敢用..
理論上應該很需要,因為這樣就只需要處理一份通訊錄
不過FB/linkin/twitter上的朋友差異很大
尤其當FB有加一些遊戲用朋友時..
我不敢用..
理論上應該很需要,因為這樣就只需要處理一份通訊錄
不過FB/linkin/twitter上的朋友差異很大
尤其當FB有加一些遊戲用朋友時..
blue butler 藍牙裝置程式化
http://itunes.apple.com/tw/app/blue-butler/id509128601?l=zh&mt=12
應該可以用來設定當連接到藍牙裝置時,自動執行某些程式用的
也可用來同步圖片
恩..大概要一些藍牙重度使用者才有需要
我寧願要一個外接硬碟同步的程式
應該可以用來設定當連接到藍牙裝置時,自動執行某些程式用的
也可用來同步圖片
恩..大概要一些藍牙重度使用者才有需要
我寧願要一個外接硬碟同步的程式
2012年6月17日 星期日
appdropota 用網路分享app用於測試
2012/6/18 下午2:46
http://itunes.apple.com/tw/app/appdropota/id473083833?l=zh&mt=12
用網路把要測試的app直接丟到mac或iphone用為測試用
不過bug似乎頗多,前置要求也不少的樣子
app測試和圖片分享畢竟需求完全不同..
不太好用
skala preview(測試圖片用)就比較簡單了
http://itunes.apple.com/tw/app/appdropota/id473083833?l=zh&mt=12
用網路把要測試的app直接丟到mac或iphone用為測試用
不過bug似乎頗多,前置要求也不少的樣子
app測試和圖片分享畢竟需求完全不同..
不太好用
skala preview(測試圖片用)就比較簡單了
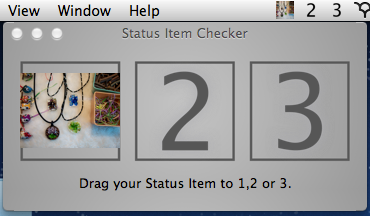
status item check 用來確認 bar icon效果
http://itunes.apple.com/tw/app/status-item-checker/id511609329?l=zh&mt=12
用來檢查圖片放在status bar效果的app
把圖片放到app box中就會出現在status bar上
非常方便
不過他們說明好差..雖然是免費的 :p
applause app排行榜背景
http://itunes.apple.com/us/app/applause/id436338263?mt=12
這是一套非常有趣的東西 XD
不過大概只對開發者和行銷人員有用
applause可以取得mac/iphone/ipad排行榜上最高的app
並把他們的icon顯示為桌面背景
對於某些對於app排行榜有興趣的人會很有用,不過也僅止於此..
這是一套非常有趣的東西 XD
不過大概只對開發者和行銷人員有用
applause可以取得mac/iphone/ipad排行榜上最高的app
並把他們的icon顯示為桌面背景
對於某些對於app排行榜有興趣的人會很有用,不過也僅止於此..
pharo launcher 虛擬/實機檔案交換用
http://itunes.apple.com/us/app/pharo-launcher/id503025789?mt=12
一套用來處理虛擬機器和實機檔案交換的工具
我是用Paralles跑VM
對我而言,實用性沒那麼高
一套用來處理虛擬機器和實機檔案交換的工具
我是用Paralles跑VM
對我而言,實用性沒那麼高
2012年6月10日 星期日
mac lion 修改time hine backup interval備份間隔
Mac 10.6 lion
lion time machine 的備份設定在 /System/Library/LaunchDaemons下的 com.apple.backup-auto.plist
開啟之後,有個設定StartInterval,如下
<key>StartInterval</key>
<integer>3600</integer>
修改其中的數值即可
這數值是以分鐘計算,3600就是一小時
其他注意要點:
lion time machine 的備份設定在 /System/Library/LaunchDaemons下的 com.apple.backup-auto.plist
開啟之後,有個設定StartInterval,如下
<key>StartInterval</key>
<integer>3600</integer>
修改其中的數值即可
這數值是以分鐘計算,3600就是一小時
其他注意要點:
- 建議先備份檔案
- 這是系統資料夾,需要使用者權限,使用一般的編輯器時,儲存後記得再開啟一次確認檔案是否有更改
- 沒有可使用的編輯器時,可以使用以下指令 sudo pico /System/Library/LaunchDaemons/com.apple.backupd-auto.plist 修改完畢後,使用 ctrl+o 寫入檔案,再按一次enter確認覆蓋,最後使用ctrl+x 退出退出後可以再輸入一次指令確認是否更新成功,然後使用ctrl+x 退出
2012年6月6日 星期三
使用zoom level設定mapview
從這邊來的
http://troybrant.net/blog/2010/01/set-the-zoom-level-of-an-mkmapview/
作者透過對MKMapView設定category加入了zoom level功能
code備份
// MKMapView+ZoomLevel.h
#import <MapKit/MapKit.h>
@interface MKMapView (ZoomLevel)
- (void)setCenterCoordinate:(CLLocationCoordinate2D)centerCoordinate
zoomLevel:(NSUInteger)zoomLevel
animated:(BOOL)animated;
@end
// MKMapView+ZoomLevel.m
#import "MKMapView+ZoomLevel.h"
#define MERCATOR_OFFSET 268435456
#define MERCATOR_RADIUS 85445659.44705395
@implementation MKMapView (ZoomLevel)
#pragma mark -
#pragma mark Map conversion methods
- (double)longitudeToPixelSpaceX:(double)longitude
{
return round(MERCATOR_OFFSET + MERCATOR_RADIUS * longitude * M_PI / 180.0);
}
- (double)latitudeToPixelSpaceY:(double)latitude
{
return round(MERCATOR_OFFSET - MERCATOR_RADIUS * logf((1 + sinf(latitude * M_PI / 180.0)) / (1 - sinf(latitude * M_PI / 180.0))) / 2.0);
}
- (double)pixelSpaceXToLongitude:(double)pixelX
{
return ((round(pixelX) - MERCATOR_OFFSET) / MERCATOR_RADIUS) * 180.0 / M_PI;
}
- (double)pixelSpaceYToLatitude:(double)pixelY
{
return (M_PI / 2.0 - 2.0 * atan(exp((round(pixelY) - MERCATOR_OFFSET) / MERCATOR_RADIUS))) * 180.0 / M_PI;
}
#pragma mark -
#pragma mark Helper methods
- (MKCoordinateSpan)coordinateSpanWithMapView:(MKMapView *)mapView
centerCoordinate:(CLLocationCoordinate2D)centerCoordinate
andZoomLevel:(NSUInteger)zoomLevel
{
// convert center coordiate to pixel space
double centerPixelX = [self longitudeToPixelSpaceX:centerCoordinate.longitude];
double centerPixelY = [self latitudeToPixelSpaceY:centerCoordinate.latitude];
// determine the scale value from the zoom level
NSInteger zoomExponent = 20 - zoomLevel;
double zoomScale = pow(2, zoomExponent);
// scale the map’s size in pixel space
CGSize mapSizeInPixels = mapView.bounds.size;
double scaledMapWidth = mapSizeInPixels.width * zoomScale;
double scaledMapHeight = mapSizeInPixels.height * zoomScale;
// figure out the position of the top-left pixel
double topLeftPixelX = centerPixelX - (scaledMapWidth / 2);
double topLeftPixelY = centerPixelY - (scaledMapHeight / 2);
// find delta between left and right longitudes
CLLocationDegrees minLng = [self pixelSpaceXToLongitude:topLeftPixelX];
CLLocationDegrees maxLng = [self pixelSpaceXToLongitude:topLeftPixelX + scaledMapWidth];
CLLocationDegrees longitudeDelta = maxLng - minLng;
// find delta between top and bottom latitudes
CLLocationDegrees minLat = [self pixelSpaceYToLatitude:topLeftPixelY];
CLLocationDegrees maxLat = [self pixelSpaceYToLatitude:topLeftPixelY + scaledMapHeight];
CLLocationDegrees latitudeDelta = -1 * (maxLat - minLat);
// create and return the lat/lng span
MKCoordinateSpan span = MKCoordinateSpanMake(latitudeDelta, longitudeDelta);
return span;
}
#pragma mark -
#pragma mark Public methods
- (void)setCenterCoordinate:(CLLocationCoordinate2D)centerCoordinate
zoomLevel:(NSUInteger)zoomLevel
animated:(BOOL)animated
{
// clamp large numbers to 28
zoomLevel = MIN(zoomLevel, 28);
// use the zoom level to compute the region
MKCoordinateSpan span = [self coordinateSpanWithMapView:self centerCoordinate:centerCoordinate andZoomLevel:zoomLevel];
MKCoordinateRegion region = MKCoordinateRegionMake(centerCoordinate, span);
// set the region like normal
[self setRegion:region animated:animated];
}
@end
iOS下rich text file RTF檔案顯示方式
RTF檔案可以直接用UIWebview顯示
方法如下
NSBundle *bundle = [NSBundle mainBundle];
NSURL *indexFileURL = [bundle URLForResource:@"about" withExtension:@"rtf"];
[webView loadRequest:[NSURLRequest requestWithURL:indexFileURL]];
不過這方法無法更改字型大小
預設字型又超大,最後還是回頭用html了
這文章只是一個犯錯記錄
方法如下
NSBundle *bundle = [NSBundle mainBundle];
NSURL *indexFileURL = [bundle URLForResource:@"about" withExtension:@"rtf"];
[webView loadRequest:[NSURLRequest requestWithURL:indexFileURL]];
不過這方法無法更改字型大小
預設字型又超大,最後還是回頭用html了
這文章只是一個犯錯記錄
2012年6月4日 星期一
自訂scrollableview的pagecontrol 顏色
Tintaium scrollablevie有提供pageontrolColor屬性
不過這屬性設定的是pageControl的背景顏色
前景(dot)顏色不能自訂
查了一下,剛好有人針對這點做出一個自訂模組
原始版本
https://gist.github.com/2417902
加強:加入scrollableView.addEventListener("postlayout", onPostLayout);
https://gist.github.com/2729533
用法
if(sView && sView.views && sView.views.length > 0) {
require('PageControl');
var sViewPagingControl = new PagingControl(sView);
sView.add(sViewPagingControl);
window.add(sView);
}
不過這個模組有幾個缺點
var container = Titanium.UI.createView({
bottom:0, //置底
left: 0,
width: scrollableView.width,
height: 20
});
for (var i = 0; i < numberOfPages; i++) {
page = Titanium.UI.createView({
borderRadius: 4,
width: 8,
height: 8,
//讓pageControl保持在view中間
left: (scrollableView.width- (15*numberOfPages))/2+15 * i,
backgroundColor: pageColor,
opacity: 0.5
});
不過這屬性設定的是pageControl的背景顏色
前景(dot)顏色不能自訂
查了一下,剛好有人針對這點做出一個自訂模組
原始版本
https://gist.github.com/2417902
加強:加入scrollableView.addEventListener("postlayout", onPostLayout);
https://gist.github.com/2729533
用法
if(sView && sView.views && sView.views.length > 0) {
require('PageControl');
var sViewPagingControl = new PagingControl(sView);
sView.add(sViewPagingControl);
window.add(sView);
}
不過這個模組有幾個缺點
- pageControl的顏色其實無法自訂,要自己修改
- paeControl的位置會固定在左邊中間,這也要自己修改
var container = Titanium.UI.createView({
bottom:0, //置底
left: 0,
width: scrollableView.width,
height: 20
});
for (var i = 0; i < numberOfPages; i++) {
page = Titanium.UI.createView({
borderRadius: 4,
width: 8,
height: 8,
//讓pageControl保持在view中間
left: (scrollableView.width- (15*numberOfPages))/2+15 * i,
backgroundColor: pageColor,
opacity: 0.5
});
2012年6月3日 星期日
rate app in titanium
在titanium 裡面加入 rate app 功能的作法
來源 https://gist.github.com/1011043
/**
* The following snippet will ask the user to rate your app the second time they launch it.
* It lets the user rate it now, "Remind Me Later" or never rate the app.
*/
var win = Ti.UI.createWindow({ backgroundColor: '#fff' });
win.addEventListener('open', checkReminderToRate);
win.add(Ti.UI.createLabel({ text: 'This is a simple app that will remind you to rate it.' }));
win.open();
function checkReminderToRate() {
var now = new Date().getTime();
var remindToRate = Ti.App.Properties.getString('RemindToRate');
if (!remindToRate) {
Ti.App.Properties.setString('RemindToRate', now);
}
else if (remindToRate < now) {
var alertDialog = Titanium.UI.createAlertDialog({
title: 'Please rate this app!',
message: 'Would you take a moment to rate this app?',
buttonNames: ['OK', 'Remind Me Later', 'Never'],
cancel: 2
});
alertDialog.addEventListener('click', function(evt) {
switch (evt.index) {
case 0:
Ti.App.Properties.setString('RemindToRate', Number.MAX_VALUE);
// NOTE: replace this with your own iTunes link; also, this won't WON'T WORK IN THE SIMULATOR!
if (Ti.Android) {
Ti.Platform.openURL('URL TO YOUR APP IN THE GOOGLE MARKETPLACE');
}
else {
Ti.Platform.openURL('URL TO YOUR APP IN THE ITUNES STORE');
}
break;
case 1:
// "Remind Me Later"? Ok, we'll remind them tomorrow when they launch the app.
Ti.App.Properties.setString('RemindToRate', now + (1000 * 60 * 60 * 24));
break;
case 2:
Ti.App.Properties.setString('RemindToRate', Number.MAX_VALUE);
break;
}
});
alertDialog.show();
}
}
訂閱:
文章 (Atom)